Tutorial
This tutorial will help you create your first Edifice app. We will create an app that converts measurements in different units.
First, install Edifice:
pip install pyedifice
Note
Edifice supports both the PySide2 library and the PyQt5 library for Qt bindings (both are covered in the automated unit tests). Edifice uses the PySide2 library by default and includes it as a dependency. If you have no preference between PySide2 and PyQt5, you can ignore this aside.
If you would prefer to use the PyQt5 library and do not wish to install PySide2, you can run:
pip install watchdog  # A dependency required for dynamic reloads
pip install qasync  # A dependency required for asyncio integration
pip install --no-dependencies pyedifice
You can switch to using PyQt5 by setting the EDIFICE_QT_VERSION environment variable to PyQt5:
# Add to your bashrc
export EDIFICE_QT_VERSION=PyQt5
Let us create the basic skeleton of our UI. Copy this code into a new file, for example tutorial.py:
import edifice as ed
from edifice import Label, TextInput, View

window = View(layout="row")(  # Layout children in a row
    Label("Measurement in meters:"),
    TextInput(""),
    Label("Measurement in feet:"),
)

if __name__ == "__main__":
    ed.App(window).start()
What does this code do? View is an example of a Component, which are the building blocks of an application.
The View component receives layout="row" as an argument in its constructor.
We refer to layout as a “prop” of the View component – it is a property passed to the View.
We also see this funny notation where we call the constructed View object with several arguments:
Label, TextInput, etc.
What this does is to add the Label, TextInput, etc, as the children of the View.
In HTML or XML, you might have written it as:
<View layout="row">
    <Label text="Measurement in meters" />
    <TextInput text="" />
    <Label text="Measurement in feet" />
</View>
We pass the created View (which we called window)
to an edifice App,
which is responsible for actually doing the rendering.
For the simplest applications, this is all you need to make a GUI. When you start managing more state (e.g. currently input values in the textbox, user preferences, etc), or when you want to break complex UI into smaller parts, or when you want to share UI logic across multiple parts of your application and across many applications, defining your own Component class makes life much easier with almost no conceptual or code overhead:
import edifice as ed
from edifice import Label, TextInput, View

# Declare your own component, MyApp. The render function describes how your custom component is to be rendered
class MyApp(ed.Component):
    def render(self):
        return View(layout="row")(
            Label("Measurement in meters:"),
            TextInput(""),
            Label("Measurement in feet:"),
        )

if __name__ == "__main__":
    ed.App(MyApp()).start()
The (admittedly-humble) Component you created can be shared across apps or composed in this single application. Most importantly, when you start having more Components, each Component is a self-contained unit with all its business logic bundled together.
The render function of a Component describes how the component is to be rendered. Note that
what it returns is only a description — the actual rendering does not happen here!
In Edifice, the Edifice rendering engine, which is contained in edifice.App,
is responsible for actually doing the rendering.
It takes the description of each Component, and it decides when and how to render it and its children.
It does so by monitoring the state of each Component, and it will re-render
when the Component state changes.
Don’t worry, we’ll see an example of this in action!
As you might expect, you can run this application simply with python tutorial.py.
However, let us take advantage of Edifice’s dynamic loading capability,
so that we do not have to continually close the app and re-issue the command every time we change something.
To run the app with dynamic loading, do:
python -m edifice tutorial.py MyApp
You should see a basic form emerge. However, it’s not pretty, and it doesn’t really do anything.
We can change the formatting of the Labels, TextInputs, and Views using styling, which is broadly similar to CSS styling. Here, what we need is to add margins between the view and window boundary, make the Labels shorter, and add a margin between the label and text input. For example:
import edifice as ed
from edifice import Label, TextInput, View

class MyApp(ed.Component):
    def render(self):
        meters_label_style = {"width": 170}
        feet_label_style = {"margin-left": 20, "width": 200}
        input_style = {"padding": 2, "width": 120}
        return ed.View(layout="row", style={"margin": 10, "width": 560})(
            Label("Measurement in meters:", style=meters_label_style),
            TextInput("", style=input_style),
            Label("Measurement in feet:", style=feet_label_style),
        )

if __name__ == "__main__":
   ed.App(MyApp()).start()
If you want to make adjustments to this styling, you can simply edit your source file, and all changes will automatically be reflected.
Our application still doesn’t do anything, however. Let’s add an on_change event handler to the input boxes.
This function will be called whenever the contents in the text input changes, allowing us to ensure that the numbers in the input
box and in the label are in sync:
import edifice as ed
from edifice import Label, TextInput, View

METERS_TO_FEET = 3.28084

def str_to_float(s):
    try:
        return float(s)
    except ValueError:
        return 0.0


class MyApp(ed.Component):

    def __init__(self):
        super().__init__()
        self.meters = "0.0"

    def render(self):
        meters = self.meters
        feet = "%.3f" % (str_to_float(meters) * METERS_TO_FEET)

        meters_label_style = {"width": 170}
        feet_label_style = {"margin-left": 20, "width": 200}
        input_style = {"padding": 2, "width": 120}
        return ed.View(layout="row", style={"margin": 10, "width": 560})(
            Label("Measurement in meters:", style=meters_label_style),
            TextInput(meters, style=input_style,
                      on_change=lambda text: self.set_state(meters=text)),
            Label(f"Measurement in feet: {feet}", style=feet_label_style),
        )

if __name__ == "__main__":
    ed.App(MyApp()).start()
We add a constructor for this class, where we initialize the attribute meters.
Meters is a state variable;
we expect all changes to meters to be reflected in the UI.
Indeed, we can think of the render function as a map from the Component state,
meters, to UI.
In the render function, we read the value of meters and convert it to feet,
and we populate the text input and label with the meters and feet respectively.
For the text input, we add an on_change callback.
This function is called whenever the content of the text input changes.
In the on_change callback, we call the set_state function.
The set_state function will set self.meters to the new value of the input box,
and it will trigger a re-render.
It is important to call set_state instead of setting self.meters = text
directly,
so that Edifice knows about state changes and could re-render the UI to accurately reflect the current state.
If you want to see the state changes in action, you can open the Component Inspector:
python -m edifice --inspect tutorial.py MyApp
The Component Inspector allows you to see the current state and props for all components in an UI (which, of course, was created with Edifice). Play around with the application and see how the state changes.
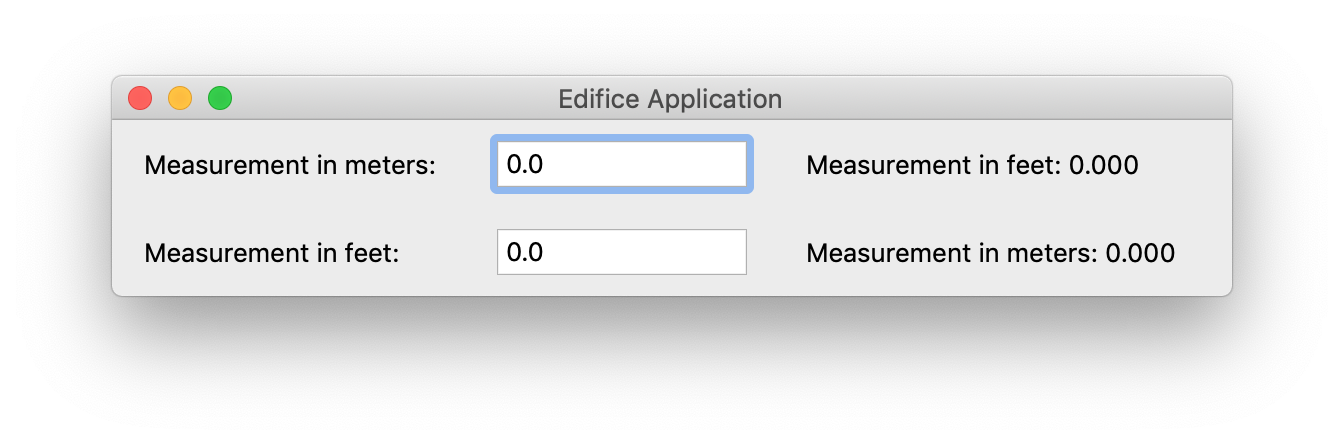
Now suppose we want to add conversion from feet to meters. Instead of copying our code and repeating it for each measurement pair, we can factor out the conversion logic into its own Component:
import edifice as ed
from edifice import Label, TextInput, View

METERS_TO_FEET = 3.28084

def str_to_float(s):
    try:
        return float(s)
    except ValueError:
        return 0.0


class ConversionWidget(ed.Component):

    @ed.register_props
    def __init__(self, from_unit, to_unit, factor):
        super().__init__()
        self.current_text = "0.0"

    def render(self):
        from_text = self.current_text
        to_text = "%.3f" % (str_to_float(from_text) * self.props.factor)

        from_label_style = {"width": 170}
        to_label_style = {"margin-left": 20, "width": 200}
        input_style = {"padding": 2, "width": 120}
        return ed.View(layout="row", style={"margin": 10, "width": 560})(
            Label(f"Measurement in {self.props.from_unit}:", style=from_label_style),
            TextInput(from_text, style=input_style,
                      on_change=lambda text: self.set_state(current_text=text)),
            Label(f"Measurement in {self.props.to_unit}: {to_text}", style=to_label_style),
        )

class MyApp(ed.Component):

    def render(self):
        return ed.View(layout="column")(
            ConversionWidget("meters", "feet", METERS_TO_FEET),
            ConversionWidget("feet", "meters", 1 / METERS_TO_FEET),
        )

if __name__ == "__main__":
    ed.App(MyApp()).start()
Factoring out the logic makes it trivial to add conversions between pounds and kilograms, liters and gallons, etc.
Oh, by the way—you can do the exact same thing in 18 lines of code, using the Form Component (implemented using Edifice, similar to but more general than the ConversionWidget component above):
import edifice as ed
from edifice.components.forms import Form

METERS_TO_FEET = 3.28084

form = ed.View(layout="column")(
    Form(ed.StateManager({
        "Measurement in meters": 0.0,
        "Measurement in feet": lambda data: data["Measurement in meters"] * METERS_TO_FEET
    }),
    Form(ed.StateManager({
        "Measurement in feet": 0.0,
        "Measurement in meters": lambda data: data["Measurement in feet"] / METERS_TO_FEET
    }),
)

if __name__ == "__main__":
    ed.App(form).start()
But where’s the fun in that?